
Where Do I Start with My Bathroom Remodeling Project?
Posted On
Jul 4, 2024
Jul 4, 2024
Jul 4, 2024
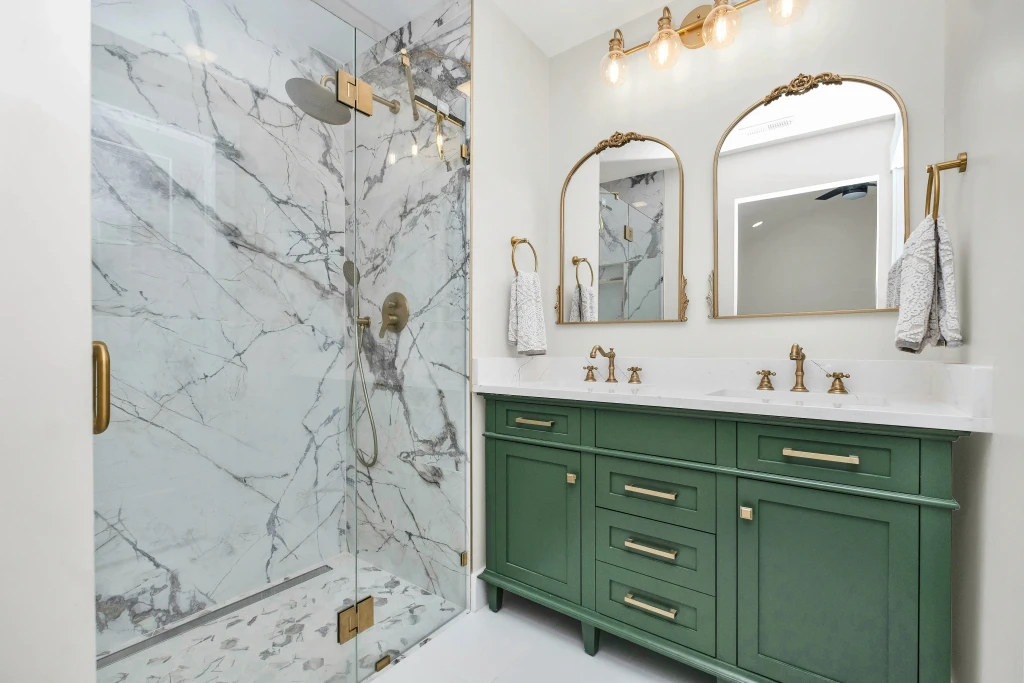
Get started on your bathroom transformation with our remodeling guide. Discover expert advice on budgeting, planning, and whether to DIY or hire professionals. Uncover practical tips and insights to avoid common pitfalls, ensuring your space becomes both beautiful and functional.
Get started on your bathroom transformation with our remodeling guide. Discover expert advice on budgeting, planning, and whether to DIY or hire professionals. Uncover practical tips and insights to avoid common pitfalls, ensuring your space becomes both beautiful and functional.
What Are the First Steps to Plan a Bathroom Remodel Without Overspending?
Planning a bathroom remodel without overspending requires a mix of careful budgeting, clear priorities, and strategic shopping. Start by assessing your needs, setting a budget, and identifying cost-effective solutions to achieve the best results.
Setting a Budget and Sticking to It
Begin by determining a realistic budget based on the size and scope of your remodel. Allocate funds for key expenses, including plumbing, fixtures, and labor, and reserve 10-20% for unforeseen costs. This approach keeps your spending in check and helps you prioritize essential upgrades.
Prioritizing Needs Versus Wants
Focus on addressing critical needs, such as fixing leaks or improving ventilation, before moving on to aesthetic upgrades like modern fixtures or luxury finishes. By prioritizing functionality, you create a space that works well and adds value.
Researching Cost-Effective Materials and Solutions
Explore budget-friendly materials without compromising quality. Look for sales, discounted items, or gently used options to save money. Consider affordable yet durable choices like ceramic tiles or acrylic bathtubs to achieve a stylish and polished look without exceeding your budget.
How Do I Decide Between a DIY Approach and Hiring a Professional for My Bathroom Remodel?
Deciding between a DIY approach or hiring a professional for your bathroom remodel is a critical step that can significantly impact your project's success. Here's a breakdown of factors to consider and the pros and cons of each option.
Pros and Cons of a DIY Remodel
Pros:
Cost Savings: Save on labor costs by doing the work yourself.
Creative Control: Retain full control over the design and implementation.
Personal Satisfaction: Achieve a sense of accomplishment by completing the project yourself.
Cons:
Time-Consuming: DIY projects often take longer to complete, especially for beginners.
Specialized Tools Required: Some tasks require specific tools you may need to purchase or rent.
Risk of Mistakes: Errors can lead to additional costs and repairs down the line.
When to Hire a Contractor or Designer
Hiring professionals is essential when your remodel involves complex tasks such as:
Plumbing and Electrical Work: These require compliance with building codes.
Structural Changes: Expertise and permits are needed for tasks like removing walls or adding new layouts.
High-End Finishes: Precision work is necessary for luxury materials and fixtures.
Professionals bring experience and efficiency, ensuring the job is done correctly and safely. For purely aesthetic updates, a DIY approach might still be feasible.
Estimating the Scope of Your Abilities and Time
Assess your skill level honestly:
DIY-Friendly Tasks: Painting, installing shelves, or replacing hardware.
Professional-Only Tasks: Moving plumbing fixtures, rewiring electrical systems, or custom cabinetry installation.
Additionally, consider your available time. A lack of experience can make simple tasks more time-intensive, which could delay the project. Hiring professionals can help meet deadlines, especially for large-scale renovations.
Tips for Making the Right Decision
Start Small: If you’re new to remodeling, begin with a small project to gauge your skills.
Consult Professionals: Even if you plan to DIY, consulting an expert can provide clarity and avoid costly errors.
Budget for Professional Help: Allocate a portion of your budget for professional intervention in case your DIY project becomes overwhelming.
By carefully weighing these factors, you can choose the approach that best aligns with your budget, timeline, and skill set, ensuring a successful bathroom remodel.
Is Hiring a Designer Necessary, or Can I Rely on Inspiration from Platforms Like Pinterest?
Deciding whether to hire a designer or rely on platforms like Pinterest depends on your goals, budget, and level of expertise. Each option offers distinct advantages that can shape the success of your bathroom remodel.
Benefits of Working with a Professional Designer
Hiring a professional designer can save time, reduce stress, and prevent costly mistakes. Designers bring years of expertise and can:
Create a Cohesive Plan: Tailor the design to your space, needs, and preferences.
Manage Technical Details: Address aspects like lighting, ventilation, and building codes.
Provide Access to Resources: Leverage connections with trusted contractors and suppliers for quality materials and services.
How to Translate Inspiration into Actionable Plans
If you prefer a DIY approach inspired by platforms like Pinterest, follow these steps:
Organize Your Ideas: Save your favorite designs and categorize them by theme, color, or functionality.
Create a Mood Board: Combine your inspirations into a visual guide to clarify your vision.
Consult Professionals: Share your mood board with contractors or designers to ensure feasibility and refine details.
Avoiding Common Design Pitfalls from Online Trends
While Pinterest and similar platforms offer endless inspiration, not all designs are practical or durable. Keep these tips in mind:
Focus on Timeless Styles: Choose designs that won’t feel outdated in a few years.
Prioritize Functionality: Ensure your layout works for your lifestyle and space.
Verify Feasibility: Confirm that chosen materials and layouts align with your budget and structural requirements.
By evaluating your specific needs and goals, you can decide whether to invest in professional design services or use online inspiration as a cost-effective alternative.
In What Order Do You Renovate a Bathroom?
Renovating a bathroom requires careful planning and adherence to a logical sequence to avoid costly mistakes and delays. By following a step-by-step approach, you can ensure an efficient and high-quality remodel.
Importance of Following a Logical Renovation Sequence
A well-structured renovation plan prevents damage to new installations and ensures every phase progresses smoothly. Begin with essential systems like plumbing and electrical work, which set the foundation for the rest of the project. Save aesthetic elements, like painting and fixtures, for the final stages to protect them from accidental damage.
Typical Renovation Timeline
Demolition: Clear out old fixtures, tiles, and cabinets to create a clean slate for new installations.
Plumbing and Electrical Upgrades: Update pipes, wiring, and outlets to meet current codes and support modern fixtures.
Waterproofing and Tiling: Apply waterproofing materials to wet areas and lay down tiles for walls and floors.
Fixture Installation: Install major fixtures such as the bathtub, toilet, and sink to ensure proper alignment and functionality.
Painting and Finishing Touches: Add final design elements, paint the walls, and complete any decorative details.
What Steps Can Overlap to Save Time?
To expedite the process, some tasks can be performed simultaneously. For example:
Tiling Walls and Floors Together: Saves time while maintaining a cohesive look.
Installing Fixtures After Tiling: Ensures precise measurements and avoids unnecessary tile cuts.
However, overlapping tasks must be approached with caution to ensure quality. Each step should be completed correctly to prevent rework or compromises in the remodel’s durability.
By adhering to this structured timeline and considering where efficiencies can be made, you can achieve a seamless and successful bathroom renovation.
Should Demolition or Plumbing Upgrades Come First in a Bathroom Remodel?
When starting a bathroom remodel, understanding the proper sequence of tasks is crucial to avoid setbacks and unnecessary expenses. The decision to begin with demolition or plumbing upgrades depends on the unique circumstances of your space, but there are general guidelines to ensure an efficient process.
Preparing the Space for Demolition
The first step in any remodel is preparing the area for demolition. This involves:
Clearing the Area: Remove fixtures, cabinets, tiles, and any other items obstructing access to plumbing and structural components.
Protecting Adjacent Rooms: Seal off nearby spaces with plastic sheeting to prevent dust and debris from spreading.
Inspecting the Site: Check for any pre-existing issues like mold or structural weaknesses before proceeding.
A well-prepared demolition sets the stage for a smoother remodeling process, minimizing potential complications down the line.
Addressing Plumbing and Structural Needs Early
Once the space is cleared, plumbing upgrades should follow immediately. This phase includes:
Replacing Outdated Pipes: Swap out old, corroded, or inefficient plumbing to ensure reliable performance.
Fixing Leaks and Low Pressure: Address existing issues to prevent future water damage.
Installing New Plumbing Fixtures: Position pipes and connections for new sinks, toilets, or showers based on the updated layout.
Completing plumbing upgrades early allows for seamless integration with subsequent steps like tiling and fixture installation.
Key Risks to Avoid During This Phase
To avoid costly mistakes, consider these risks:
Skipping Inspections: Failing to thoroughly assess plumbing and structural integrity can lead to hidden problems that resurface later.
Rushing Demolition: Hastily tearing out old materials without proper planning may damage essential systems or surfaces.
Neglecting Safety Measures: Ensure the area is secure and free from hazards before beginning work.
By following these steps and addressing plumbing needs after demolition, you can create a strong foundation for a successful and stress-free bathroom remodel.
Is It Better to Install the Flooring Before or After the Vanity and Fixtures?
Deciding whether to install flooring before or after the vanity and fixtures is an important consideration for ensuring a seamless, durable, and cost-effective bathroom remodel. Both approaches have advantages and potential drawbacks, and the right choice often depends on your specific renovation goals and layout.
Pros and Cons of Flooring-First Installation
Pros:
Achieving a Seamless Look: Installing flooring first creates a uniform surface across the entire bathroom, making the space appear larger and more polished.
Flexibility in Fixture Placement: With flooring in place, you have more freedom to adjust the placement of vanities and fixtures without needing additional tiling.
Cons:
Risk of Damage During Installation: Newly installed flooring may be scratched or damaged when heavy fixtures like vanities or toilets are installed later.
Higher Material Costs: Tiling the entire floor, including areas under fixtures, can increase costs if those sections won’t be visible.
Why Fixture Placement Can Affect Flooring Decisions
Installing fixtures first can save money by reducing the amount of flooring needed. However, this approach requires:
Precise Measurements: Ensuring tiles fit perfectly around the base of fixtures, which can be time-intensive.
Skilled Installation: Improperly cut tiles around fixtures can detract from the room’s appearance and may lead to issues like water seepage.
This method is often preferred for budget-conscious renovations or when fixtures are fixed and unlikely to be replaced in the near future.
Expert Tips for Seamless Transitions
Regardless of your chosen approach, these tips can help achieve a flawless finish:
Protect the Flooring: If you install flooring first, use protective coverings during fixture installation to prevent scratches and dents.
Seal Edges Properly: Apply waterproof sealant around fixture bases to prevent water damage and maintain durability.
Plan Ahead: Consult with contractors to determine the most efficient sequence for your specific layout and materials.
By understanding the benefits and challenges of each method and implementing these strategies, you can make an informed decision that enhances the functionality and aesthetic appeal of your bathroom remodel.
Can Skipping Steps Like Waterproofing Lead to Long-Term Issues?
Waterproofing is a critical step in any bathroom remodel that directly impacts the longevity, safety, and overall functionality of the space. Skipping this step or cutting corners can lead to severe long-term consequences.
The Importance of Waterproofing in Wet Areas
Waterproofing acts as a protective barrier that prevents water from seeping into walls, floors, and underlying structures. This is especially important for:
Showers and Bathtubs: Constant exposure to water makes these areas highly vulnerable to leaks.
Bathroom Floors: Spills and splashes can easily penetrate unprotected surfaces, causing damage over time.
Wet Zones Near Fixtures: Areas around sinks and toilets benefit from added waterproofing to combat water exposure.
Proper waterproofing not only prevents leaks and mold but also enhances the durability of your bathroom.
Common Mistakes in Skipping Essential Steps
Neglecting or improperly executing waterproofing can result in:
Water Damage: Seepage into walls and floors can weaken structures and create costly repairs.
Mold and Mildew Growth: Moist environments promote mold, which poses health risks and requires professional remediation.
Material Degradation: Without waterproofing, tiles, grout, and other materials may crack, discolor, or detach over time.
Always use high-quality, professional-grade waterproofing materials to ensure the job is done right the first time.
Cost Implications of Neglecting Waterproofing
Skipping waterproofing might seem like a cost-saving measure initially, but it often leads to:
Expensive Repairs: Fixing water damage can be two to three times more costly than investing in waterproofing upfront.
Decreased Home Value: Potential buyers may notice damage or lack of waterproofing, lowering the resale value of your property.
Increased Maintenance Costs: Frequent repairs for recurring issues drain both time and money.
Investing in proper waterproofing ensures durability, protects your home’s value, and provides peace of mind for years to come.
Where to Start with a Bathroom Remodel?
Starting a bathroom remodel can feel overwhelming, but breaking it down into manageable steps makes the process straightforward and efficient. Here’s how to begin:
Assessing Your Bathroom’s Current Condition
A thorough assessment helps you understand the existing state of your bathroom. Focus on:
Structural Issues: Look for leaks, water damage, or unstable flooring.
Outdated Fixtures: Identify items like faucets, toilets, or bathtubs that need replacement.
Ventilation and Lighting: Ensure proper air circulation and adequate lighting to avoid mold and create a functional space.
Space Utilization: Evaluate whether the current layout meets your needs or if adjustments are necessary.
Setting Realistic Goals for Your Remodel
Define what you want to achieve with the remodel:
Functionality: Do you need more storage, better water pressure, or a walk-in shower?
Aesthetic Appeal: Choose a theme or design style that suits your taste and complements your home.
Budget and Timeline: Establish a realistic budget and timeframe to keep the project on track.
Setting clear goals helps prioritize tasks and ensures the remodel aligns with your vision and resources.
Identifying High-Priority Upgrades
Tackle essential repairs and updates first to build a solid foundation for the remodel:
Plumbing and Electrical Systems: Address outdated wiring, leaky pipes, or low water pressure to ensure safety and reliability.
Structural Repairs: Fix any issues with walls, floors, or ceilings that could affect the project’s longevity.
Aesthetic Enhancements: Once the critical upgrades are complete, focus on cosmetic improvements like tiles, paint, and fixtures.
By starting with these key areas, you can create a functional, beautiful bathroom that meets your needs and adds value to your home.
How Important Is Creating a Mood Board or Design Plan Before Starting a Bathroom Remodel?
Creating a mood board or design plan is a vital step in ensuring your bathroom remodel is cohesive, functional, and aligned with your vision. It helps streamline decision-making and reduces the risk of costly mistakes.
Benefits of Visualizing Your Design
A mood board allows you to:
See the Big Picture: Combine colors, textures, and styles to visualize how they work together.
Ensure Cohesion: Avoid mismatched elements by planning a unified design theme.
Identify Gaps: Spot missing elements or inconsistencies in your design before purchasing materials.
This tool simplifies communication with contractors and ensures everyone is aligned on the final vision.
Tools and Platforms to Create a Mood Board
Utilize digital tools to craft your mood board efficiently:
Pinterest: Create boards to collect and organize ideas by themes or rooms.
Canva: Use templates to arrange photos, colors, and material swatches visually.
Houzz: Explore curated designs and save them for reference.
For a tactile approach, print images and collect physical samples of materials like tiles or paint swatches.
Translating Your Vision into Actionable Steps
Turn your mood board into a practical design plan with these steps:
Select Core Elements: Decide on key pieces like tiles, fixtures, and paint colors.
Create a Priority List: Identify which elements are must-haves and allocate your budget accordingly.
Share with Professionals: Present your mood board to contractors or designers to clarify expectations and discuss feasibility.
By visualizing your ideas and breaking them into actionable tasks, you ensure your remodel proceeds smoothly and achieves your desired outcome.
Should I Focus on Structural Updates or Aesthetic Changes First?
Deciding whether to focus on structural updates or aesthetic changes first is crucial for a successful and stress-free bathroom remodel. Here’s a detailed guide to help you prioritize effectively.
Balancing Function and Form in Renovations
Functionality should always take precedence to ensure the space meets your practical needs. Once functional upgrades are complete, aesthetic updates can enhance the overall appeal and elevate the design of your bathroom.
Prioritize Safety: Address any safety concerns like faulty wiring or plumbing leaks to create a secure environment.
Plan for Usability: Ensure the layout and features are user-friendly and meet daily requirements.
When Structural Changes Take Precedence
Structural updates are essential when addressing foundational issues. These include:
Faulty Plumbing: Leaks, clogs, or outdated systems must be fixed to avoid future water damage.
Poor Ventilation: Proper airflow prevents mold and mildew, ensuring a healthier bathroom environment.
Unstable Flooring: Reinforce or replace flooring to prevent accidents and support new fixtures.
Ignoring these problems can lead to costly repairs down the line and hinder the success of your remodel.
Timing Aesthetic Updates for Maximum Impact
Aesthetic upgrades should follow structural improvements to protect new designs and finishes from potential damage during construction. Here’s how to approach them effectively:
Final Touches: Save painting, tiling, and decor installation for last to prevent wear and tear.
Design Consistency: Choose elements like tiles, colors, and fixtures that complement the overall theme of your home.
Budget Allocation: Invest in high-impact areas like lighting and cabinetry for a polished look.
By addressing structural needs first and planning aesthetic changes strategically, you can achieve a bathroom remodel that is both functional and visually stunning.
What Do You Install First in a Bathroom Remodel?
Deciding on the installation order during a bathroom remodel is key to achieving a seamless and efficient outcome. Starting with the right steps ensures durability, functionality, and a polished appearance.
Bathtub/Shower Installation Essentials
The bathtub or shower should be installed first as these fixtures are often the largest and serve as the foundation for the room’s layout. Here’s why this step is crucial:
Space Planning: Installing the bathtub or shower early helps define the placement of other fixtures.
Structural Integrity: Heavy fixtures require a strong, reinforced base, which is easier to prepare before other installations.
Sequencing Fixtures for Efficiency
After the bathtub or shower, follow this sequence to maximize efficiency:
Tiling and Waterproofing: Lay down tiles and waterproofing materials to protect wet areas and ensure a smooth surface for subsequent installations.
Toilet Installation: Fit the toilet after tiling to align it with the finished floor height and ensure proper sealing.
Vanity and Sink Installation: Place these fixtures last to avoid damage during heavy-duty tasks like tiling and plumbing.
This order minimizes the risk of damage and ensures fixtures fit seamlessly within the completed design.
Tips for Avoiding Common Installation Mistakes
Measure Twice, Cut Once: Accurate measurements are critical for aligning fixtures and avoiding costly adjustments.
Follow Manufacturer Guidelines: Adhere to installation instructions for each fixture to maintain warranties and ensure proper function.
Consult Professionals When Needed: Complex installations, such as custom showers or built-in tubs, benefit from professional expertise to prevent errors.
By following this installation sequence and these tips, you’ll set a strong foundation for a successful and aesthetically pleasing bathroom remodel.
What Is a Realistic Budget for a Bathroom Remodel?
Planning a realistic budget for a bathroom remodel ensures you can achieve your vision without financial strain. Here's a detailed guide to help you allocate funds wisely and account for hidden costs.
Breaking Down Costs by Category
Labor: Expect labor to take up 30-50% of your total budget, covering tasks like demolition, plumbing, tiling, and installation.
Materials: Allocate funds for essential materials such as tiles, flooring, paint, and fixtures. Opt for durable options to minimize long-term maintenance costs.
Fixtures: Set aside a portion of your budget for vanities, toilets, showers, and bathtubs. Mid-range options typically balance cost and quality.
Unforeseen Expenses: Reserve 10-20% of your budget for unexpected issues like plumbing repairs, structural reinforcements, or mold removal.
Accounting for Hidden Expenses
Permits and Inspections: Include fees for necessary permits and inspections to ensure your remodel complies with local codes.
Disposal Costs: Factor in the cost of removing old fixtures, tiles, and debris.
Temporary Solutions: Plan for temporary measures like portable toilets or alternative bathing options if the remodel takes longer than expected.
Budgeting Tips for Small and Large Bathrooms
Small Bathrooms:
Focus on impactful yet cost-effective upgrades like repainting, replacing fixtures, or installing new lighting.
Consider refinishing or reglazing instead of replacing items like bathtubs or sinks.
Large Bathrooms:
Prioritize high-quality materials for long-lasting durability.
Allocate funds for luxury upgrades like heated floors, custom cabinetry, or walk-in showers.
Invest in smart technologies, such as touchless faucets or programmable lighting, for added convenience and resale value.
By planning your budget carefully and accounting for potential surprises, you can execute a successful bathroom remodel that aligns with your financial goals and expectations.
What Are the Most Expensive Parts of a Bathroom Remodel?
Understanding the costliest elements of a bathroom remodel can help you prioritize and budget effectively. Here’s a breakdown of the major expenses:
Plumbing and Electrical Work Costs
Upgrading plumbing and electrical systems can be one of the most significant expenses in a remodel due to the labor-intensive nature of the work and the need for compliance with building codes:
Plumbing Upgrades: Replacing outdated pipes, relocating fixtures, or adding new plumbing systems requires skilled labor and durable materials, especially for custom setups.
Electrical Updates: Installing new lighting, outlets, or upgrading your electrical panel to handle modern fixtures adds to the cost but ensures safety and efficiency.
High-End Fixtures and Materials
Luxury materials and designer fixtures can quickly escalate your budget but also elevate the overall aesthetic and value of your bathroom:
Designer Tiles: Intricate patterns, natural stone, or imported tiles add sophistication but come with a premium price tag.
Smart Fixtures: High-tech additions like touchless faucets, LED mirrors, or programmable showers offer convenience and style but are pricier than standard options.
Custom Cabinetry: Tailored storage solutions maximize space but are significantly more expensive than pre-fabricated options.
When to Splurge Versus Save
Knowing where to allocate your budget is key to balancing quality and cost:
Splurge On:
Faucets and Showerheads: Opt for durable, high-quality materials that withstand daily use and add a luxurious touch.
Waterproofing and Subflooring: Invest in long-lasting solutions to prevent water damage and ensure structural integrity.
Toilets and Bathtubs: Choose reliable brands for fixtures that are used frequently and impact functionality.
Save On:
Decorative Elements: Mirrors, towel racks, and other accents can be upgraded later.
Standard Tiles: Use affordable tiles for less visible areas and reserve luxury options for focal points like backsplashes.
Lighting Fixtures: Stylish yet budget-friendly options can enhance the space without overspending.
By focusing your spending on critical components and durable materials, you can create a high-end look while staying within your budget.
Related Post
Related Post
Related Post


Want To Work With Us?

Reach Us
8407 Central Ave, Suite 2079, Newark, CA 94560
Lic. #1095467
Want To Work With Us?
Reach Us
8407 Central Ave, Suite 2079, Newark, CA 94560
Lic. #1095467
Want To Work With Us?
Reach Us
8407 Central Ave, Suite 2079, Newark, CA 94560
Lic. #1095467